If you’re looking to grind your own meat at home, the Kitchenaid meat grinder attachment is a great option. Here’s how to hook it up:
1. First, attach the grinder attachment to the power hub of your Kitchenaid stand mixer.
2. Then, fit the grinding worm onto the shaft of the grinder attachment.
3. To start grinding, simply turn on your mixer and feed your desired cuts of meat into the hopper opening at the top of the grinder attachment. The ground meat will come out through the die plate located at the bottom of the attachment.
4. When you’re finished grinding, simply detach the grinder attachment and wash it (along with any other parts that came in contact with raw meat) in hot, soapy water.
5. Plug in the Kitchenaid meat grinder attachment to the Kitchenaid mixer
6. Put the desired amount of meat into the feed tube of the attachment
7. Turn on the Kitchenaid mixer to start grinding the meat
8. Grind the meat until it reaches the desired consistency
9. Stop the mixer and unplug the attachment when finished grinding
How to Use a Kitchenaid Meat Grinder Attachment and Review
How Do You Attach a Kitchenaid Attachment?
If you’re looking to get the most out of your KitchenAid stand mixer, then attachments are a must. With the right attachments, your KitchenAid can do everything from kneading dough to juicing fruits and vegetables. But if you’ve never attached one before, it can be a bit daunting.
Here’s a quick guide on how to attach a KitchenAid attachment.
To start, make sure that your mixer is turned off and unplugged. Then, depending on the attachment you’re using, there are two different ways to attach it.
For some attachments, like the pasta roller or shredder/slicer, you’ll need to remove the bowl from the mixer first. To do this, simply lift up on the bowl-lift lever until the bowl is released. Once the bowl is removed, you can then attach the desired attachment.
For other attachments, like the meat grinder or citrus juicer, there’s no need to remove the bowl first; they can be attached directly onto the mixer base.
Once you have your attachment in place (whether it’s on top of the mixer base or in place of the mixing bowl), it’s time to secure it into place. All attachments come with their own locking mechanism; for example, some have a small knob that needs to be turned clockwise until tight, while others may have a lever that needs to be flipped into position.
Consult your owner’s manual for specific instructions on how to lock your particular attachment into place.
Now all that’s left to do is plug in your mixer and turn it on – time to start cooking (or baking)!
Which Way Does the Blade Go on a Kitchenaid Meat Grinder?
Assuming you are referring to the KitchenAid stand mixer attachment meat grinder (https://www.kitchenaid.com/major-appliances/countertop-appliances/food-processors-grinders/meat-grinders/ksmgca.html),
To install, first make sure the power hub of your KitchenAid stand mixer is turned off and unplugged. Then attach the meat grinder to the power hub using the screws that come with it.
Once it is secure, insert the metal plate (with the blade facing down) into position on top of the feed tube. Make sure the blade is secured by tightening the two screws on either side of it. You’re now ready to start grinding!
How Do I Get My Kitchenaid Attachment to Work?
If you’re having trouble getting your KitchenAid attachment to work, there are a few things you can try. First, make sure that the attachment is properly fastened to the mixer. If it’s not, it won’t be able to function properly.
Also, check to see if the speed setting on your mixer is set too low. The attachment may not work correctly if the speed is set too low. Finally, make sure that there’s nothing blocking the path of the attachment (such as food or liquid).
If all of these things are in order and the attachment still isn’t working, it may be defective and you’ll need to contact KitchenAid for further assistance.
How Do You Connect a Mixer to a Grinder?
If you’re looking to grind your own coffee beans, you’ll need a grinder. And if you want to make sure all the flavors of your grounds are evenly mixed, you’ll need a mixer too. Here’s how to connect a mixer to a grinder so you can get the most out of your cup of joe:
First, determine which type of grinder you have. There are two main types: blade and burr. Blade grinders work by chopping up the beans with spinning blades, while burr grinders use abrasive surfaces to crush the beans into uniform pieces.
Next, identify where your grinder’s power cord plugs into the back of the machine. Once you’ve located this port, plug one end of your mixer’s power cord into it.
Now it’s time to attach the mixing paddle or whisk attachment to your mixer.
Make sure that this attachment is securely fastened before proceeding.
Finally, turn on both devices and mix away! Start slowly at first and gradually increase the speed until everything is well combined.
Then enjoy your delicious cup of freshly-mixed coffee!

Credit: www.kitchenaid.com
Kitchenaid Meat Grinder Parts
If you’re a fan of making your own ground meat at home, then you know that having a good quality meat grinder is key. And if you’ve got a Kitchenaid stand mixer, then the Kitchenaid meat grinder attachment is a great option. But even the best quality products can have parts that wear out or break over time.
That’s why it’s important to know where to find replacement Kitchenaid meat grinder parts, in case you need them. There are a few different places to look for these replacement parts. One option is to check with the manufacturer directly.
They should be able to provide you with what you need. Another place to look is online retailers who sell Kitchenaid products. These retailers usually have a good selection of parts and accessories for all kinds of different appliances.
Finally, if you’re having trouble tracking down the specific part you need, there are some companies that specialize in manufacturing aftermarket Kitchenaid parts. These companies can often times provide high quality replacements for discontinued or hard-to-find items. No matter where you find your replacement Kitchenaid meat grinder parts, make sure you compare prices and shipping costs before making your final purchase.
With a little bit of effort, you should be able to find everything you need to keep your appliance running like new for many years to come!
How to Disassemble Kitchenaid Meat Grinder
If you’re looking to clean your Kitchenaid meat grinder, or if you need to replace a broken part, you’ll need to know how to disassemble it. Here’s a step-by-step guide on how to do just that:
1. Unplug the meat grinder from any power source.
2. Remove the screw that holds the grinding plate in place (typically located at the top of the grinder).
3. Take out the grinding plate, along with the cutting blade and auger. These parts can be washed in warm, soapy water.
4. To remove the stomper (the plunger-like piece), simply unscrew it from the body of the grinder. Again, this part is dishwasher safe.
5. The final step is to detach the food pusher from the feed tube assembly. This can be done by lightly pressing down on it while turning it counterclockwise. And that’s it!
How to Use Kitchenaid Meat Grinder
If you’re looking for a way to grind your own meat at home, then you may be wondering how to use a Kitchenaid meat grinder. This handy appliance can make quick work of grinding up fresh or frozen meats, and with a little practice, you’ll be able to get the perfect grind every time. Here are some tips on how to use your Kitchenaid meat grinder:
1. Read the instruction manual that came with your machine carefully before using it. This will help ensure that you’re familiar with all the parts and functions of the machine.
2. If you’re grinding fresh meat, start by cutting it into small pieces that will fit easily into the mouth of the grinder. If you’re using frozen meat, let it thaw slightly so that it’s easier to work with.
3. To attach the food pusher to the grinder, insert it into the hole in the front of the machine and twist it clockwise until it locks into place.
4. Place your meat onto the feed tube located on top of the machine, and then use the food pusher to push it down towards the blade. Be sure not to overfeed the machine – only push down as much meat as can fit comfortably into its opening without jamming upthe works.
5. Once all of your meat has been fed through, turn offthe machine and unplug it from its power source before disassembling everything for cleaning.
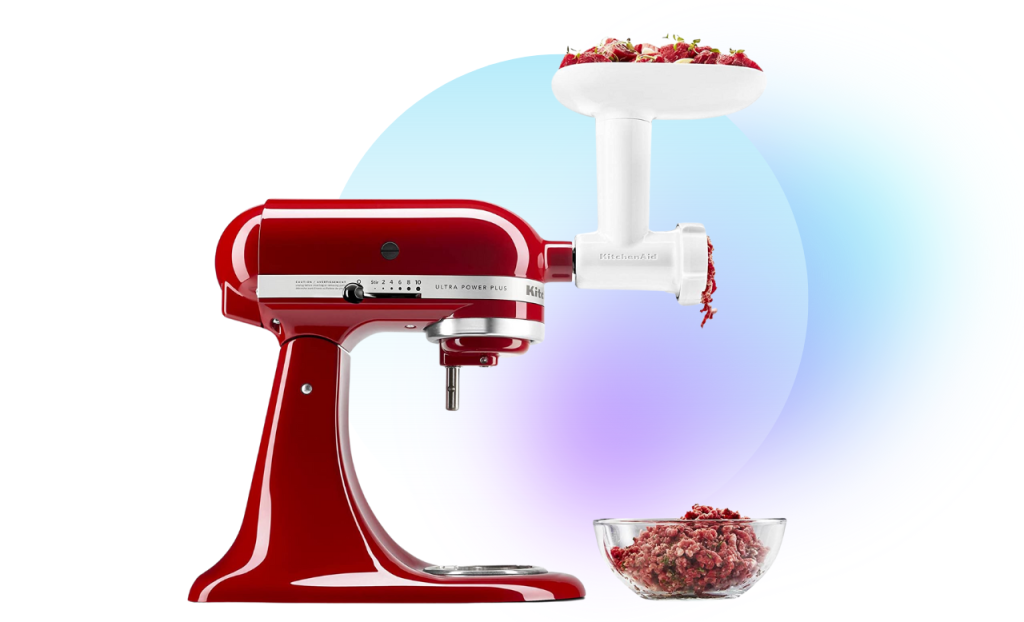
Best Kitchenaid Meat Grinder Attachment
If you’re a fan of KitchenAid products, then you’ll love the Kitchenaid meat grinder attachment. This handy tool attaches to your KitchenAid stand mixer, making it easy to grind meat at home. The attachment comes with a coarse and fine grinding plate, as well as a sausage stuffer kit.
It’s also dishwasher safe for easy cleanup.
Whether you want to grind your own meat for burgers or make your own sausage, the Kitchenaid meat grinder attachment is up for the task. It’s durable and easy to use, making it a great option for anyone who wants to do their own meat grinding at home.
Kitchenaid Meat Grinder Speed
When it comes to grinding meat, the Kitchenaid Meat Grinder is a powerhouse. It can grind up to 3 pounds of meat per minute, making short work of even the most challenging tasks. And thanks to its high speed, it can handle both tough and delicate meats with ease.
So how does the Kitchenaid Meat Grinder achieve such impressive results? Part of it has to do with its design. The grinder features a powerful 1,000-watt motor that delivers consistent power and torque.
Additionally, its die-cast metal construction ensures durability and longevity.
But what really sets the Kitchenaid Meat Grinder apart is its speed settings. Unlike other grinders which only have two or three speed settings, the Kitchenaid has six different speed settings.
This gives you complete control over the grinding process, allowing you to create perfect results every time.
If you’re looking for a top-of-the-line meat grinder that can handle any task with ease, then look no further than the Kitchenaid Meat Grinder. With its powerful motor and six different speed settings, it’s sure to make quick work of even your toughest grinding jobs!
Kitchenaid Meat Grinder Troubleshooting
If your Kitchenaid meat grinder is giving you trouble, there are a few things you can do to troubleshoot the problem. First, check to make sure that the grinder is properly assembled and all of the parts are securely in place. Next, make sure that the meat grinder attachment is properly attached to the Kitchenaid stand mixer.
Finally, check the grind settings on the meat grinder to ensure that they are set correctly for the type of meat you are grinding. If you still have trouble with your Kitchenaid meat grinder, contact customer service for assistance.
Kitchenaid Food Grinder Recipes
Assuming you would like recipes that can be made using a KitchenAid food grinder: 1. Grinding Your Own Beef Ingredients
-2-3 lbs of boneless beef chuck roast, trimmed of fat -1/2 cup cold water -1 teaspoon salt
-1/2 teaspoon black pepper Instructions
1. Cut the beef chuck roast into 1″ cubes and place them in a large bowl. Add the water, salt, and pepper to the bowl and stir everything together until the beef is evenly coated. Cover the bowl with plastic wrap and refrigerate for at least 2 hours, or overnight.
2. When you’re ready to grind the beef, fit your KitchenAid stand mixer with the meat grinder attachment. Turn the mixer to speed 4 and slowly add the beef cubes to the feed tube. Grind all of the meat until it’s been completely processed. You may need to stop a few times to scrape down the sides of the attachment so that everything grinds evenly.
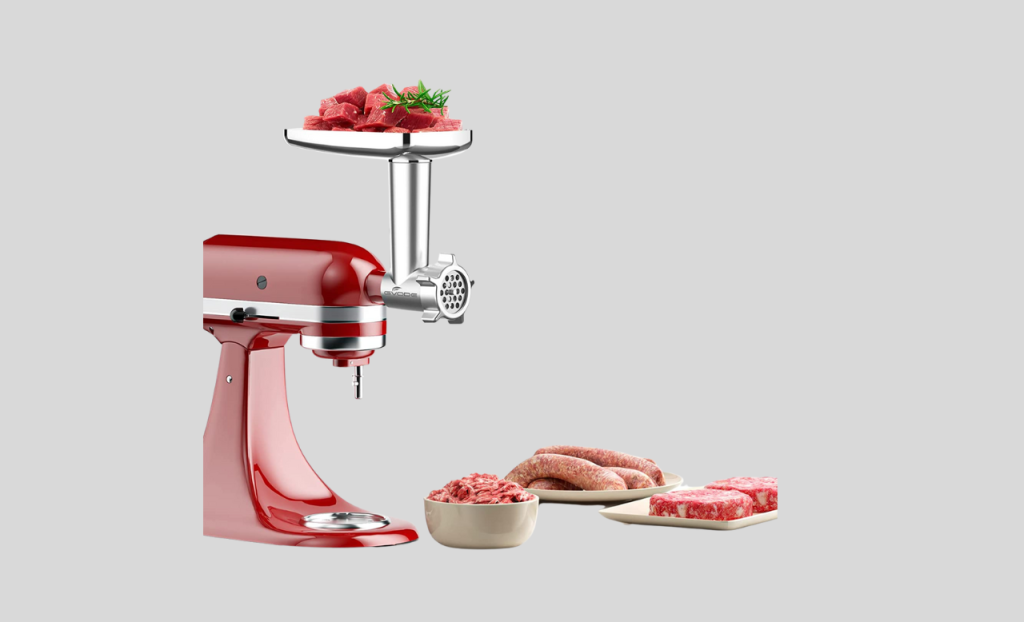
Kitchenaid Meat Grinder Metal
If you’re looking for a metal meat grinder that can handle any job, big or small, then the Kitchenaid Meat Grinder Metal is the perfect choice. This grinder is made from high-quality stainless steel, so it’s built to last and can take on even the toughest grinding jobs. Plus, it comes with a powerful motor that can handle any amount of meat, no matter how tough it is.
And if you’re worried about safety, don’t be – the Kitchenaid Meat Grinder Metal has a safety switch that prevents it from operating unless all parts are securely in place. So go ahead and give it a try – your next BBQ will be better than ever!
Conclusion
If you’re looking to grind your own meat at home, the Kitchenaid meat grinder attachment is a great option. It’s easy to set up and use, and it produces consistent results. Whether you’re grinding beef, pork, or poultry, the Kitchenaid meat grinder attachment is up to the task.