To clean the Kitchenaid meat grinder attachment, disassemble the parts and wash them in warm, soapy water. Rinse with clear water and dry thoroughly before reassembling.
- Remove the meat grinder attachment from your Kitchenaid mixer
- Disassemble the meat grinder attachment, being sure to remove all of the parts
- Wash all of the parts in warm, soapy water
- Be sure to scrub any areas that have ground meat or fat build-up
- Rinse all of the parts well and allow them to air dry completely before reassembling the meat grinder attachment
How to Clean the New KitchenAid® Metal Food Grinder Attachment
How Do You Clean a Meat Grinder Attachment?
If you’re like most people, you probably don’t clean your meat grinder attachment as often as you should. And that’s understandable because it can be a bit of a pain to disassemble and clean all the parts. But if you want to keep your grinder in good working order (and avoid any potential food safety issues), it’s important to give it a good cleaning every now and then.
Here’s a step-by-step guide to cleaning a meat grinder attachment:
1. Disassemble the grinder. This is usually the most time-consuming part of the process, but it’s also the most important. You need to ensure that all parts are clean before reassembling the grinder.
2. Clean all of the parts with hot, soapy water. A scrub brush can help eliminate any stubborn bits of meat or fat stuck on the parts. Rinse everything off well when you’re done scrubbing.
3. sanitize all the parts with 1 tablespoon of bleach per gallon of water solution. Let them soak for at least 5 minutes, then rinse off with clean water.
4 . Dry all of the parts thoroughly before reassembling the grinder. If even one part is damp, it could cause rusting or other problems down the line. Use a clean towel or let them air dry completely.
5. Reassemble your meat grinder attachment, ensuring that all screws, bolts, and other moving parts are tightened securely.
How Do You Remove Oxidation from Kitchenaid Attachments?
If your KitchenAid attachments are starting to show signs of oxidation, there are a few different ways you can clean them. One way is to use a mixture of water and vinegar. Simply mix together equal parts water and vinegar in a bowl or container, and then soak your attachments in the mixture for 30 minutes.
After 30 minutes, remove your attachments from the mixture and scrub them with a soft-bristled brush. You may need to repeat this process a few times to get rid of all the oxidation.
Another way to remove oxidation from KitchenAid attachments is to use lemon juice.
Lemon juice is a natural cleaner and disinfectant, so it’s perfect for cleaning off any dirt or grime that might be on your attachments. Simply mix together some lemon juice and water in a bowl or container, and then soak your attachments in the mixture for 30 minutes. After 30 minutes, remove your attachments from the mixture and scrub them with a soft-bristled brush.
Again, you may need to repeat this process multiple times to get rid of all the oxidation.
If you’re looking for a more heavy-duty solution, you can try using baking soda. Baking soda is great for removing tough stains and build-up, so it’s ideal for getting rid of stubborn oxidation on your KitchenAid attachments.
To use this method, simply make a paste out of baking soda and water (you’ll want about 1 part baking soda to 2 parts water). Then apply the paste onto your attachments using a soft-bristled brush or cloth, making sure to cover all areas that are oxidized.
How Do I Clean My Kitchenaid Attachments?
If you own a KitchenAid mixer, chances are you’ve used the attachments that come with it to make everything from cookies to pasta. But what do you do when those attachments need a little cleaning? Here’s a step-by-step guide to get your KitchenAid attachments clean and looking like new again.
To start, unplug your mixer and detach all of the attachments. If any of the attachments have been used for ingredients that may stain, such as chocolate or tomato sauce, it’s best to clean them right away. Fill your sink with warm, soapy water and let the attachments soak for about 15 minutes.
After soaking, use a soft brush or sponge to scrub away any remaining food particles. Rinse the attachments well with warm water and dry them completely before attaching them back to your mixer. For tougher stains, mix a baking soda and water paste and rub it onto the attachment with a soft cloth.
Let the paste sit on the attachment for 15 minutes before rinsing it off and drying completely. You can also use white vinegar diluted with water in place of the baking soda paste if needed.
Is Kitchenaid Meat Grinder Attachment Dishwasher Safe?
If you’re wondering if the KitchenAid meat grinder attachment is dishwasher safe, the answer is yes! You can safely put this attachments in the dishwasher to clean it. However, there are a few things to keep in mind.
First, make sure that you remove any food particles from the attachment before putting it in the dishwasher. This will help ensure that your dishwasher doesn’t get clogged. Secondly, it’s best to place the attachment on the top rack of your dishwasher to avoid any damage.
With these tips in mind, you can easily clean your KitchenAid meat grinder attachment in the dishwasher.
Can You Wash Kitchenaid Attachments in Dishwasher?
If you’re wondering whether you can wash your KitchenAid attachments in the dishwasher, the answer is yes! Most KitchenAid attachments are dishwasher safe, with the exception of a few (such as the ice cream maker attachment). So if your attachment is dishwasher safe, feel free to toss it in and let the dishwasher do its job.

Credit: www.amazon.com
How to Disassemble Kitchenaid Meat Grinder
If you’re looking to clean your Kitchenaid meat grinder, you’ll need to disassemble it first. Here’s a step-by-step guide on how to do just that:
1. Unplug the meat grinder from any power source.
2. Remove the die plate by loosening the two screws that hold it in place. Once the die plate is removed, set it aside along with the screws.
3. Next, remove the cutting blade by unscrewing its retaining nut. Again, set this aside from the other parts you’ve removed.
4. The next step is to remove the auger from the grinder head. To do this, simply unscrew its retaining ring and then pull it out of the grinder head. Set the auger aside with the other parts you’ve removed.
5. The final step is to remove the stomper from the grinder head assembly.
Kitchenaid Meat Grinder Attachment How to Use
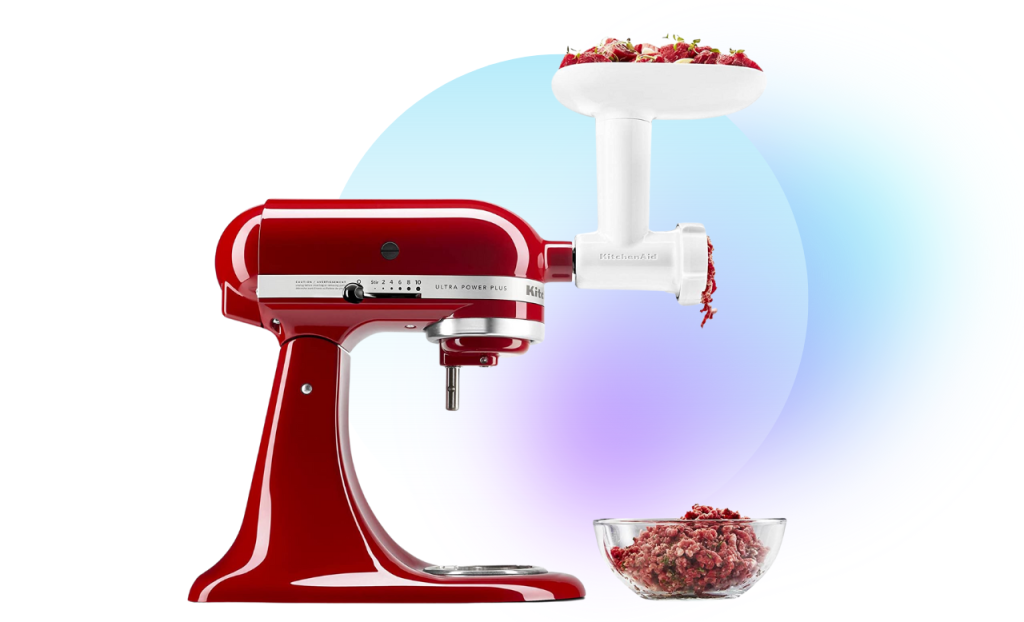
If you’re a fan of making your own ground meat at home, then you’ll love the Kitchenaid Meat Grinder Attachment. This handy tool attaches to your Kitchenaid stand mixer and makes quick work of grinding meat for burgers, sausages, and more. In this post, we’ll show you how to use the Kitchenaid Meat Grinder Attachment and share some tips on getting the most out of it.
To start, make sure that your Kitchenaid stand mixer is properly assembled and that the meat grinder attachment is securely attached. Then, select the grinding plate that you will use depending on the grind size that you want. For a finer grind, choose a smaller plate; for a coarser grind, choose a larger plate.
Once you’ve selected your grinding plate, it’s time to start grinding! Simply feed small pieces of meat into the opening at the top of the grinder attachment while it’s running on low speed. The ground meat will come out through the hole in front of the attachment.
If desired, you can also add seasonings or other ingredients (e.g., bread crumbs) to the mix as it’s being ground. Just be sure not to overfill the opening or exceed the recommended amount of ingredients for your particular model of Kitchenaid Meat Grinder Attachment . Once you’re finished grinding all of your meat (or other ingredients), simply detach the grinder attachment from your stand mixer and wash according to manufacturer’s instructions.
That’s all there is to using this handy tool! With a little practice, you’ll be churning out perfectly-ground meats in no time flat.
Accidentally Put Kitchenaid Meat Grinder in Dishwasher
If you have ever accidentally put your Kitchenaid meat grinder in the dishwasher, you know how frustrating it can be. The good news is that there are some things you can do to fix the problem.
First, if your meat grinder is made of stainless steel, you can try using a mild detergent and a soft cloth to clean it.
If this does not work, you can also try using white vinegar or lemon juice. Just make sure to rinse the grinder well afterwards so that no acidic residue is left behind.
If your meat grinder is made of plastic, then you will need to replace it.
Unfortunately, there is no way to clean a plastic meat grinder effectively enough to make it safe for use again.
So, if you have accidentally put your Kitchenaid meat grinder in the dishwasher, don’t despair! There are ways to fix the problem and get your grinder back in working order.
Best Meat Grinder Attachment for Kitchenaid
There are a few different types of meat grinders on the market, but the best one for your Kitchenaid mixer is the attachment type. This type of grinder attaches directly to the mixer, so you don’t have to worry about it taking up extra space on your countertop. It’s also very easy to use – simply attach it to the mixer and start grinding away.
The biggest advantage of using an attachment meat grinder is that it grinds meat much more evenly than a stand-alone grinder. This is because the attachments are designed to fit snugly onto the mixing paddle, so there’s no chance of any chunks getting stuck in between them. That means you’ll get nice, even ground meat every time.
Another great thing about this type of grinder is that it’s very easy to clean. You can just detach it from the mixer and throw it in the dishwasher – no need to disassemble anything or scrub any nooks and crannies by hand.
If you’re looking for an attachment meat grinder that will make quick work of grinding up meats for burgers, sausages, or other dishes, then consider investing in one for your Kitchenaid mixer today.
Oxidized Kitchenaid Meat Grinder
If you have a Kitchenaid meat grinder that is starting to show signs of wear, it’s important to take care of it so that it doesn’t become a rusting hulk taking up space in your kitchen.
Here are some tips for keeping your Kitchenaid meat grinder in good shape:
1. Keep it clean – After each use, disassemble the meat grinder and clean all the parts with hot, soapy water. Dry everything thoroughly before reassembling. This will help prevent any food residue from building up and causing corrosion.
2. Avoid moisture – Moisture is enemy number one when it comes to preventing rust, so make sure to keep your meat grinder stored in a dry place. If you live in a humid climate, consider investing in a dehumidifier for your kitchen to help keep things nice and dry.
3. Use WD-40 – Before storing your meat grinder for extended periods of time (like over winter), give all the metal parts a good coating of WD-40. This will help create an extra barrier against moisture and rust.
Kitchenaid Meat Grinder Metal Vs Plastic
When it comes to choosing a meat grinder, one of the most important decisions you’ll make is whether to go with a metal or plastic model. There are pros and cons to both types of grinders, so it’s important to do your research before making a purchase. Here, we’ll take a look at the key differences between metal and plastic meat grinders so you can choose the right one for your needs.
Metal Meat Grinders
Pros: Metal meat grinders are generally more durable than their plastic counterparts. They’re also usually easier to clean, since there are fewer nooks and crannies for meat and fat to get stuck in.
Also, metal grinders tend to have stronger motors than plastic ones, which means they can easily handle tougher cuts of meat. Finally, many people find that metal grinders produce a slice of slightly finer ground meat than plastic ones.
Cons: The biggest downside to metal meat grinders is that they can be quite noisy – not ideal if you’re trying to avoid waking up the whole house when you make breakfast sausage! Additionally, metal models are often heavier and more difficult to move around than plastic ones. Finally, they may rust over time if not properly cared for Plastic Meat Grinders.
Pros: Plastic meat grinders are typically much lighter weight and easier to move around than their metal counterparts. They’re also usually less expensive upfront (although this doesn’t necessarily mean they’re cheaper in the long run). Additionally, many people find that plastic grinders produce less noise overall while in use.
Cons: One of the main disadvantages of plastic meat grinders is that they aren’t as durable as metal models and may need to replace more frequently asa result. They also can be more difficult to clean than metal ones since there are often more nooks and crannies for bits and meat to get stuck in.
Does the Kitchenaid Meat Grinder Grind Bones
If you’re looking for a meat grinder that can handle bones, the Kitchenaid Meat Grinder is a good option. This grinder comes with a fine plate and a coarse plate, as well as a stomper to help push the meat through the grinder. It’s also dishwasher-safe for easy cleanup.
Leixe Metal Food Grinder
Leixe Metal Food Grinder is a great addition to your kitchen. It is made of high quality stainless steel, which makes it durable and easy to clean. The grinder has a powerful motor that can grind any food quickly and easily.
It also comes with two different grinding plates, so you can choose the right one for your needs. The Leixe Metal Food Grinder is a great way to make fresh, healthy meals for your family.
Conclusion
If you own a Kitchenaid meat grinder attachment, it is important to keep it clean. Otherwise, it can become a breeding ground for bacteria. The good news is that cleaning the attachment is relatively easy.
All you need is some hot water and dish soap.