The following steps will show you how to change a circular saw blade:
1. Unplug the circular saw from the power outlet.
2. Use the Allen wrench to loosen and remove the bolt that holds the blade in place.
3. Carefully remove the old blade from the saw.
4. Install the new blade onto the saw, making sure that it is tight and secure.
5. Reattach the guard and ensure that it is properly positioned.
6. Plug in the circular saw and test it out on a piece of scrap wood before beginning your project.
- Turn off the saw and unplug it from the power source
- Remove the blade guard by loosening the screws that hold it in place
- Use a wrench to loosen the arbor nut that holds the blade in place on the saw
- Remove the old blade and dispose of it properly
- Place the new blade on the saw, making sure that the teeth are pointing in the correct direction
- Tighten down the arbor nut to secure the new blade in place, then reattach the blade guard
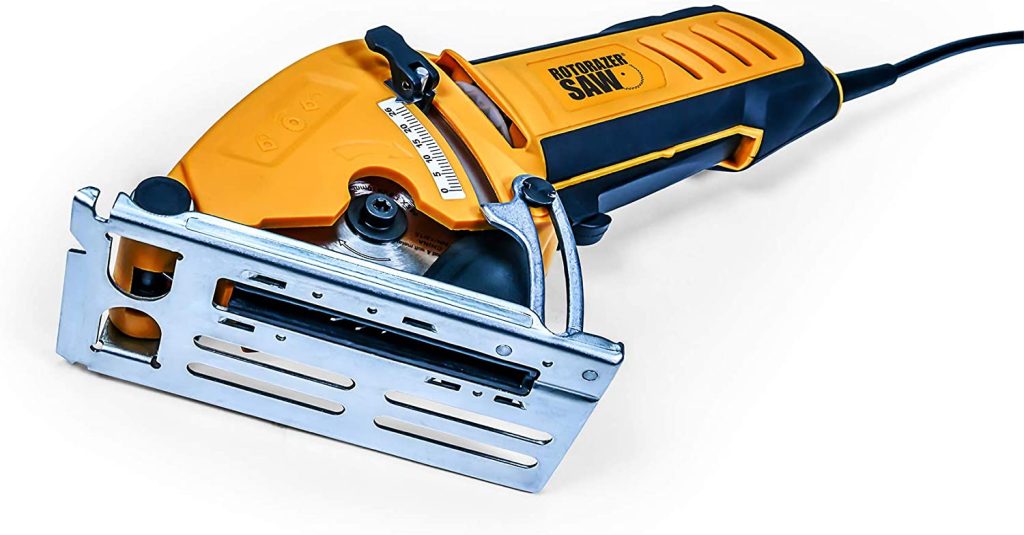
How To Change Circular Saw Blade
Is the First Step When Changing a Circular Saw Blade?
Assuming you would like a blog post discussing the steps to changing a circular saw blade: Most people don’t realize how easy it is to change the blade on their circular saw. With just a few simple steps, you can have your old blade off and a new one installed in no time.
Here’s what you need to do:
1. Unplug your saw. This is probably the most important step, as you don’t want to accidentally turn on the saw while you’re working on it.
If you have a corded model, simply unplug it from the outlet. If you have a battery-powered model, remove the battery pack.
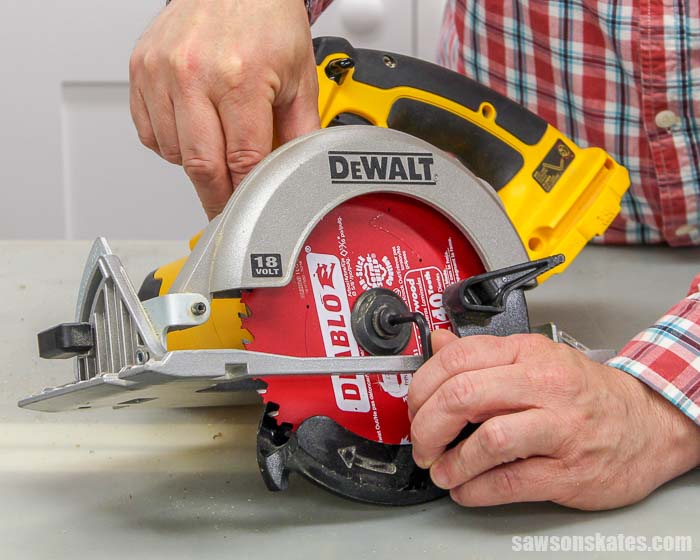
2. Loosen the bolt that holds the blade in place.
On most models, there will be a knob or lever near the front of the saw that you can use to loosen the bolt. Once it’s loose, carefully remove the old blade from the arbor (the shaft that extends from the motor).
3. Install the new blade onto the arbor and tighten it using that knob or lever.
Be sure not to overtighten – just snug it up nice and tight so that it won’t come loose while you’re using it.
How Do You Tighten a Circular Saw Blade Without a Spindle Lock?
If your circular saw has a spindle lock, simply turn off the power, disconnect the blade, and use the wrench that came with your saw to loosen and remove the old blade. To install the new one, reverse these steps.
If your circular saw does not have a spindle lock, you will need to use a different method to change the blade.
First, unplug the saw and clamp it down to your workbench so it cannot move. Next, remove the outer washer from the arbor nut by unscrewing it counterclockwise. With the washer removed, you should be able to unscrew the arbor nut by hand.
Once it is loose, pull off the inner washer and old blade. To install the new blade, reverse these steps.
How Do You Change a Blade on a Craftsman Circular Saw?
It’s important to keep your Craftsman circular saw blade in good condition by regularly changing the blade. A dull or damaged blade can make it difficult to make clean, precise cuts. Here are the steps you’ll need to follow to change the blade on your Craftsman circular saw blade:
1. Unplug the saw from any power source and remove the battery if applicable.
2. Raise the blade guard and secure it in the raised position with the locking lever. This will expose the blade so that you can safely work on it.
3. Use a wrench or socket to loosen and remove the arbor nut, which secures the blade to the saw. Be sure to hold onto the blade while doing this, as it may fall off when you remove the nut completely. If your saw has a spindle lock, engage it before loosening the arbor nut to prevent the spindle from turning while you work on it.
4. Remove the old blade from the saw and inspect it for damage or wear. If necessary, use a file to sharpen any dulled teeth before installing a new blade.
.5 Position a new blade on that saw so that its teeth are pointing in a direction opposite to that of the rotating arbor to avoid contact with it when you start the saw.
6. Securely fasten the blade to those saws by tightening the arbor nut with your wrench or socket until its snug.
7. Lower the blade guard back into place without resting your hands on top of it while its lowered as this could result in an injury if the motor were top ower on unexpectedly.
8. Once you’ve confirmed that everything is in its proper place and secured snugly, you can replug in the saw to a power source and test it out by starting it is up and making a few cuts.
.
How Do You Put a Blade on a Circular Saw for the First Time?
If you’re new to using a circular saw, the process of putting a blade on can seem daunting. However, it’s actually quite simple once you know what to do. Here’s a step-by-step guide on how to put a blade on a circular saw for the first time:
1. Unplug your circular saw from any power source. This is important for safety reasons – you don’t want the blade spinning while you’re trying to attach it!
2. Use an appropriate size Allen wrench to loosen the bolt that secures the blade in place. Depending on your model of saw, this bolt may be located either at the top or bottom of the arbor (the shaft that the blade spins on).
3. Carefully remove the old blade from the arbor, taking care not to touch the sharp edges of the teeth. If there is any debris or buildup on the old blade, clean it off before proceeding.
4. Inspect your new circular saw blade to make sure that it is compatible with your model of saw and that all of the teeth are intact and facing in the correct direction (towards the front of the blade). If everything looks good, go ahead and install it onto the arbor by lining up its holes with those on The body և tightening down The retaining bolt until The two are snugly fitted together.
Just make sure not to overtighten – doing so could strip out The threads և damage The motor housing. Now That You know How easy It Is To install A new circular saw blade On Your Circular Saw, You ever Need To replace Your current one!

Credit: www.youtube.com
Black And Decker Circular Saw Blade Change
Are you looking for an easy way to change the blade on your Black and Decker circular saw? If so, you’ve come to the right place. In this blog post, we’ll provide detailed instructions on how to do just that.
First, begin by unplugging your circular saw from the power outlet. Next, locate the spindle lock button on the side of the saw (it will likely be red). Press and hold this button while you use your other hand to rotate the blade until it is aligned with one of the slots in the spindle.
Once the blade isaligned with a slot, release the spindle lock button and removethe old blade. To install a new blade, simply insert it into one ofthe slots in the spindle and rotate it until it is locked into place.Finally, re-plug your circular saw into power and you’re ready to go!
How to Change Circular Saw Blade Without Lock
If you’re like most people, you probably don’t know how to change a circular saw blade without locking it. It’s actually not that difficult, but it does require a little bit of patience and attention to detail. Here’s what you need to do:
1. Unplug the circular saw from the power source.
2. Remove the blade guard by unscrewing the two screws that hold it in place.
3. Use an Allen wrench to loosen the bolt that secures the blade to the arbor (the shaft that extends from the motor).
4. Carefully remove the old blade, being careful not to touch the teeth (they’re sharp!).
5. Install the new blade, making sure that it is tight against the arbor flange (the flat part of the shaft). You may need to use a washer or two to get a snug fit.
Be careful not to overtighten – just snug is good! Replace the blade guard and screw it in place securely. Reattach any other parts that were removed during this process (such as vacuum attachments) and plug in your saw again before turning it on.
How to Change Circular Saw Blade Makita
If you’re looking to change the blade on your Makita circular saw, here’s what you need to do. First, make sure that the power is off and the blade is not spinning. Next, use the wrench that came with your saw to loosen the bolt that holds the blade in place.
Once the bolt is loosened, you can remove the old blade and replace it with a new one. Be sure to tighten the bolt back down before using your saw again.
Circular Saw Blade Direction
If you’re a carpenter, contractor, or just enjoy working with wood and power tools, then you know that one of the most important aspects of using a circular saw is getting the blade direction right. Depending on the type of cut you’re making, the blade needs to rotate in either a clockwise or counterclockwise direction.
Most circular saws have an arrow on the motor housing that indicates which way the blade will rotate when turned on.
If your saw doesn’t have this arrow, simply hold the saw so that the teeth of the blade are pointing away from you and turn it on. The blade should rotate away from you.
When making a rip cut (a cut along the length of a board), always use a clockwise rotation.
This will ensure that your cuts are nice and straight. For cross cuts (cuts across the grain of a board), use a counterclockwise rotation. Again, this will give you straighter cuts.
One last tip – when cutting plywood or any other material that tends to chip easily, make sure to use a fine-toothed blade with as many teeth as possible (60+). This will help prevent chipping and give you cleaner cuts overall.
How to Change Blade on Circular Saw Craftsman
If you’re like most people, you probably don’t think about changing the blade on your circular saw very often. But if you use your saw regularly, it’s important to know how to do it properly. After all, a dull blade can make even the simplest cuts more difficult.
Here’s a step-by-step guide to changing the blade on your Craftsman circular saw:
1. Unplug the saw and remove the battery (if applicable).
2. Use the wrench that came with your saw to loosen the bolt that holds the blade in place.
3. Carefully remove the old blade and discard it safely.
4. Install the new blade, making sure that it is securely tightened in place with the wrench.
5. Reattach the battery or plug in the cord and test out your new blade!
How to Change Blade on Skilsaw Circular Saw
If you’re a homeowner, it’s likely that you have a Skilsaw circular saw in your toolbox. This versatile and powerful tool is perfect for everything from cutting lumber to trimming tile. And, like any power tool, it requires periodic maintenance to keep it running smoothly.
One of the most important maintenance tasks for your Skilsaw is changing the blade. Here’s how to do it:
1. Unplug the saw from its power source and remove the battery (if applicable).
2. Flip over the saw so that you can access the blade guard.
3. Use a hex key or Allen wrench to loosen the bolt that secures the blade guard in place.
4. Remove the blade guard and set it aside.
5. Use an adjustable wrench to loosen the arbor nut that holds the blade in place on the saw’s spindle. 6. Carefully remove the old blade from the spindle and discard it safely ( blades are incredibly sharp, so handle with care!).
How to Change the Blade on a Table Saw
If you’re like most people, changing the blade on your table saw is probably not something you do every day. In fact, it’s probably something you only do when absolutely necessary. But when the time comes to replace that dull blade with a new one, it’s important to know how to do it correctly.
Here are some tips for changing the blade on a table saw:
1. First, unplug the saw from its power source and make sure there is no power running to it. You don’t want to accidentally start the saw while you’re changing the blade!
2. Next, use a wrench or other tool to loosen the arbor nut that holds the blade in place. Be careful not to drop the nut into the saw – it can be difficult to retrieve if it falls down into all of those blades!
3. Once the arbor nut is loosened, you can remove the old blade from the saw. Be careful not to touch any of the sharp edges – they’re still quite sharp even though they’re no longer attached to the saw!
4. To install the new blade, simply reverse these steps – thread the new blade onto theat Arbor and then tighten everything back up again using your wrench or other tool. Make sure everything is tight and secure before plugging the power back in and starting up the saw again.
How to Change Blade on Miter Saw
If you’re like most people, changing the blade on your miter saw is probably not something you do on a regular basis. In fact, it’s probably something you’ve never done before! But don’t worry, it’s actually pretty easy to do.
Here’s a step-by-step guide on how to change the blade on your miter saw.
1. Unplug the miter saw from its power source and make sure that there is no tension on the blade.
2. Use an Allen wrench to loosen and remove the bolt that secures the blade to the arbor (the shaft that holds the blade in place).
3. Carefully remove the old blade from the arbor and discard it properly.
4. Install the new blade onto the arbor, making sure that it is tight and secure.
5. Re-install the bolt that secures the blade to the arbor and tighten it with an Allen wrench.
Be sure not to overtighten!
Conclusion
Chances are, if you’re reading this, you already know how to use a circular saw. But just in case, we’ll go over the basics real quick. A circular saw is a power tool that uses a spinning disc or blade to cut through materials like wood and metal.
The blade is mounted on an arbor, which is attached to the motor of the saw. Most circular saws have blades that can be easily removed and replaced without too much trouble. The first thing you need to do is unplug the saw from its power source.
Then, remove the locking nut or bolts that hold the blade in place. With the blade removed, you can now install the new one by reversing the process. Be sure to tighten the locking nut or bolts securely so that the blade doesn’t come flying off while you’re using it!
Now that you know how to change a circular saw blade, there’s no excuse not to keep your saw in top condition! Regularly clean and sharpen the blade according to the manufacturer’s instructions and always use fresh blades for best results.