
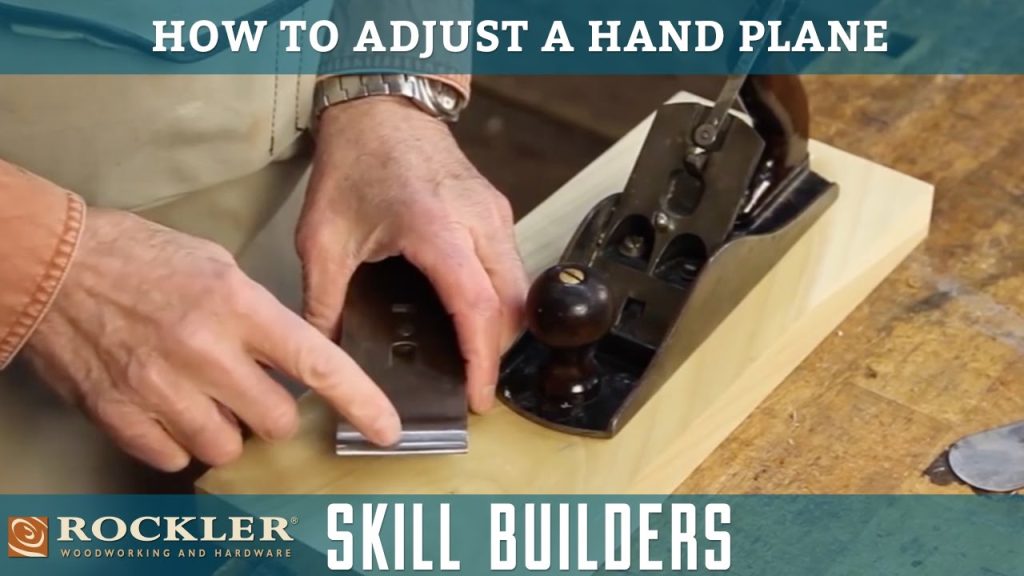
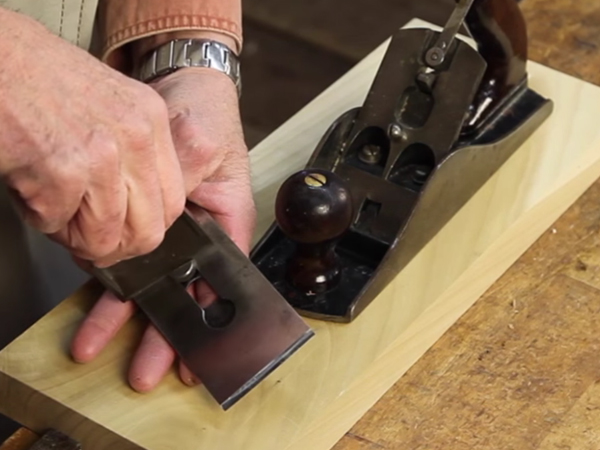
How to Adjust a Hand Planer? the answer is easy, Lets find out the ways. Begin by ensuring your planer is correctly plugged in and turned off. Remove the blade guard from the machine, exposing the blades underneath it. Using an adjustable wrench, loosen the nuts on both sides of each blade until they can be easily adjusted with a flathead screwdriver or pliers.
Adjusting a Hand Planer you should Make sure that you adjust both of them so they are even and have been tightened to secure in place after adjusting them properly to the right size for your project’s needs (thickness). Replace the blade guard over top of these newly-adjusted blades before turning on your hand planer again and begin using it as normal when needed!
Follow the tips below to Adjust a Hand Planer
- Read the user manual for your hand planer to familiarize yourself with the product and its features. Be sure to pay attention to any safety warnings that are included in the manual.
- Place your work piece on a flat surface, such as a workbench or table saw, making sure it is secure and won’t move during use.
- Make sure you have enough room around you so that you can easily adjust the tool while using it safely.
- Put on appropriate safety gear including gloves, protective eyewear and hearing protection before turning on the power switch of your hand planer.
- Slide out blade guard from front of hand planer which will expose blades inside .
- Loosen knob located at rear end of cutter head assembly to unlock depth adjustment wheel located at top end of cutter head assembly .
- Now rotate depth adjusting wheel until required cutting depth is achieved , then lock it back by tightening knob again .
- Check alignment of blades with edges near fence by holding straight edge along length side near fence line , if blades not aligned properly then loosen screws which holds them in position , reset angle according to need & tighten screws again after complete satisfaction with angle set up .
- Turn ON power switch & run trial cuts on scrap wood pieces until desired results are achieved .
- Finally turn OFF power switch & slide out blade guard back into protective position once done with adjustments & practice runs.
How to Adjust a Bench Plane | Woodworking
What Angle Should a Hand Plane Blade Be?
The angle of the blade in a hand plane should be set between 25 and 30 degrees. This provides enough cutting power to make smooth cuts, while also reducing tear-out during planing. When sharpening your blade, you should take care to maintain the original angle that was set when the tool was manufactured.
If necessary, you can adjust the angle slightly for different types of wood or desired results. Regardless of what type of woodworking project you are working on, it’s important to keep your blades sharp and well maintained for maximum efficiency and safety – setting them at an appropriate angle is key!
Should the Bevel Be Up Or down on a Hand Plane?
When it comes to setting up a hand plane, the bevel should be placed in the down position. This is because when the blade is set down, it will cut into the wood with less effort and provide a cleaner cut. Additionally, by having the bevel face downwards, you are creating an angle that allows for more efficient cutting as well as preventing any chipping or splintering along the edges of your workpiece.
As always though, make sure to double check your setup before starting any project and use personal discretion when determining what works best for each individual job!
Credit: www.woodworkersjournal.com
How to Adjust Block Plane
Block planes are incredibly versatile tools that can be used to smooth and shape wood surfaces. The key to getting the most out of a block plane is adjusting it properly. To adjust your block plane, begin by loosening the blade adjustment knob and moving the blade forward or backward until you reach the desired cutting depth.
Next, use a small screwdriver to turn the lateral lever clockwise or counter-clockwise in order to adjust the angle of attack for each side of the blade. Finally, tighten both knobs securely before testing out your new settings on scrap wood. With some practice and patience, you’ll soon master this essential skill!
How to Set Up a Hand Plane
Setting up a hand plane may seem intimidating, but it doesn’t have to be. Start by making sure the plane is clean and free of rust and dirt. Next, adjust the blade so that it sits at an angle of 25 degrees against the sole of the plane.
Make sure to securely tighten all screws with a screwdriver before testing the sharpness on some scrap wood. Finally, check that everything is properly adjusted before you start planing your workpiece!
How to Fix a Hand Planer
If your hand planer is not working properly, there are a few steps you can take to try and fix it. First, check the blades for any dullness or damage. If they are damaged in any way, replace them with new ones.
You should also make sure that all screws and nuts are tightened securely as loose components can cause problems with the planer’s operation. Finally, take time to clean out any dust or debris from the interior of the machine that could be interfering with its performance. With these simple steps you should be able to get your hand planer back up and running smoothly!
How to Install Blade in Hand Plane
Installing a blade into a hand plane is a relatively easy process, though it does require some precision and patience. Begin by loosening the bolt in the center of the hand plane with an adjustable wrench or other suitable tool. Carefully remove the old blade from its mounting slot, then insert your new blade into this same slot so that it is facing in the correct direction as indicated on your handplane.
Finally, retighten your bolt to secure the new blade firmly into place before using your plane!
How to Adjust a Stanley Hand Plane
Adjusting a Stanley Hand Plane is relatively straightforward. To start, make sure the blade is sharp and clean before you begin adjusting it. Use an adjustable wrench to loosen the locking nut on top of the plane, then adjust the depth of cut by turning the screw located at its rear end.
Finally, secure your settings with another turn of the locking nut. With these easy steps completed, your Stanley Hand Plane should be ready for use!
How to Use a Hand Planer
Using a hand planer is a great way to quickly and easily smooth out wood surfaces. To use one, start by adjusting the blade depth of your planer so it’s just slightly below the surface of the wood you’re working with. Then, turn on your planer and move it along in even passes until you’ve achieved your desired level of smoothness.
Be sure to keep an eye on any splinters that might get caught in the blade as well!
Conclusion
In conclusion, adjusting a hand planer is an important task to take on if you want to get the best performance out of your tool. It can be intimidating at first but by following these simple steps and having the right tools, it’s relatively easy to do with minimal stress or effort. With some practice you’ll quickly become familiar with the process and keeping your planer adjusted will soon become second nature.