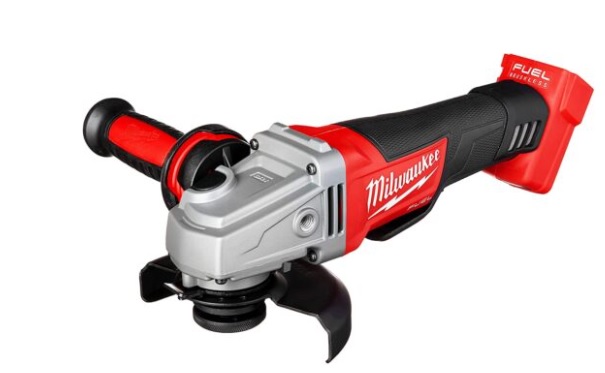
Milwaukee small grinders are renowned for their durability and performance, but even the best tools can encounter issues over time. Whether you’re dealing with a malfunctioning motor, inconsistent power, or a faulty switch, understanding how to diagnose and repair these problems can extend the life of your grinder and ensure it continues to deliver top-notch performance. This guide will walk you through common issues and provide detailed instructions on how to repair a Milwaukee small grinder.
Safety First: Preparing for Repair
Before beginning any repair work, safety should be your top priority. Here’s how to ensure a safe repair process:
Unplug the Grinder: Always disconnect the tool from the power source to prevent accidental startup.
Wear Safety Gear: Use safety glasses and gloves to protect yourself from debris and sharp parts.
Work in a Clean Area: A clutter-free workspace minimizes the risk of losing parts or making mistakes.
Diagnosing Common Issues
Understanding the symptoms of common problems is crucial in determining the right repair approach. Here are a few common issues and their potential causes:
Motor Won’t Start: Could be due to a faulty switch, worn-out brushes, or an issue with the motor itself.
Intermittent Power: Often a sign of a loose connection, damaged cord, or a problem with the switch.
Overheating: This might be caused by a clogged air vent, excessive load, or internal motor issues.
Strange Noises: Grinding or whining noises may indicate worn bearings or a misaligned motor.
Required Tools and Materials
Having the right tools and materials on hand will make the repair process smoother:
- Screwdrivers (flathead and Phillips)
- Wrenches and pliers
- Replacement parts (brushes, switches, bearings, etc.)
- Lubricant and cleaning supplies
- Multimeter (for electrical diagnostics)
Step-by-Step Repair Guide
Replacing the Motor Brushes
Motor brushes are critical components that wear out over time. Here’s how to replace them:
Disassemble the Grinder:
Remove the outer casing by unscrewing the screws holding it in place. Keep these screws in a safe location for reassembly.
Locate the Motor Brushes:
The motor brushes are typically located near the motor’s commutator. They are often housed in small compartments accessible from the outside.
Remove the Old Brushes:
Gently pull out the old brushes. Take note of their orientation to ensure you install the new ones correctly.
Install New Brushes:
Insert the new brushes into their respective compartments. Make sure they fit snugly and are properly aligned with the commutator.
Reassemble the Grinder:
Put the casing back on and secure it with screws. Test the grinder to ensure it operates smoothly.
Repairing or Replacing the Switch
A malfunctioning switch can cause power issues. Here’s how to address this problem:
Disassemble the Grinder:
Open the casing as described above.
Locate the Switch:
The switch is typically located near the handle or grip area.
Test the Switch:
Use a multimeter to check for continuity. If the switch is faulty, you’ll need to replace it.
Replace the Switch:
Disconnect the old switch by removing the wires connected to it. Install the new switch by connecting the wires in the same configuration as the old one.
Reassemble the Grinder:
Put the casing back together and test the grinder.
Addressing Overheating Issues
Overheating can be a result of clogged vents or excessive load:
Clean the Air Vents:
Use a brush or compressed air to remove dust and debris from the air vents. This helps maintain proper airflow and cooling.
Check for Overloading:
Ensure you’re not using the grinder beyond its capacity. Overloading can strain the motor and cause overheating.
Inspect the Motor:
If overheating persists, the motor might need servicing. Consider consulting a professional if you suspect internal motor issues.
Fixing Strange Noises
Strange noises often indicate issues with bearings or alignment:
Inspect Bearings:
Check for any play or roughness in the bearings. If they are worn out, they should be replaced.
Realign the Motor:
Ensure the motor and other components are properly aligned. Misalignment can cause unusual noises and affect performance.
Preventive Maintenance Tips
To avoid future repairs and extend the life of your Milwaukee grinder, consider the following maintenance tips:
Regular Cleaning: Keep the grinder clean and free of debris to prevent overheating and ensure smooth operation.
Proper Storage: Store the grinder in a dry, clean area to prevent rust and damage.
Routine Inspections: Periodically check the grinder for signs of wear and tear. Replace any worn parts promptly.
When to Seek Professional Help
While many repairs can be handled by a skilled DIYer, some issues may require professional attention. If you encounter complex motor problems or are unsure about the repair process, it’s best to consult a qualified technician to avoid further damage.
Conclusion
Repairing a Milwaukee small grinder requires a combination of technical knowledge, the right tools, and a methodical approach. By following this guide, you can address common issues effectively and ensure your grinder remains in excellent working condition. Regular maintenance and prompt repairs will help you get the most out of your tool and keep it performing at its best for years to come.


