
Whether you’re embarking on a kitchen renovation or simply sprucing up your bathroom, a ceramic tile cutter is an essential tool for achieving clean, precise cuts. This versatile tool allows you to create custom-sized tiles for your projects, ensuring a professional finish. In this guide, we’ll explore the different types of ceramic tile cutters, their key features, and provide step-by-step instructions on how to use one effectively.
Types of Ceramic Tile Cutters
There are primarily two main types of ceramic tile cutters:
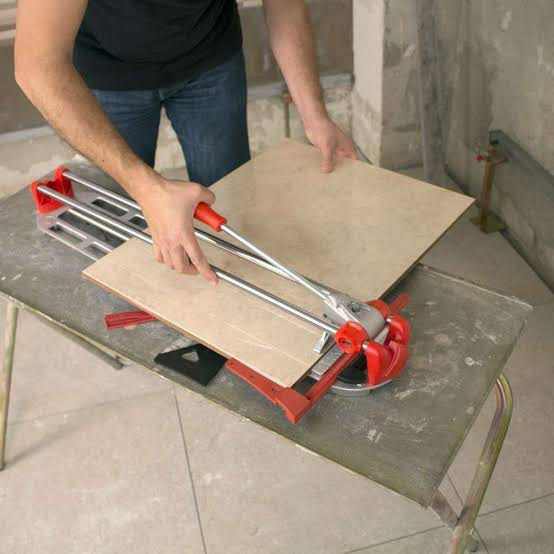
Manual Tile Cutters: These are the most basic type, typically consisting of a scoring wheel and a lever. They are suitable for smaller tiles and occasional use.
Electric Tile Cutters: Also known as wet saws, these power tools use a motorized blade to cut through tiles. They are ideal for larger tiles, frequent use, and more demanding projects.
Key Features to Consider
When choosing a ceramic tile cutter, consider the following features:
Cutting capacity: Ensure the cutter can handle the size of tiles you’ll be working with.
Scoring wheel or blade quality: A sharp scoring wheel or blade will result in cleaner cuts.
Ease of use: Look for a cutter that is comfortable to handle and has clear markings for accurate measurements.
Portability: If you plan to use the cutter in multiple locations, consider its weight and portability.
How to Use a Ceramic Tile Cutter
Measure and Mark: Measure the tile to determine the desired cut. Use a pencil or marker to mark the cutting line.
Scoring: Position the tile on the cutter’s base and align the scoring wheel or blade with the marked line. Apply firm pressure and draw the wheel or blade across the tile.
Snapping: Once the tile is scored, gently apply pressure to the opposite side of the cut line. The tile should snap cleanly along the scored line.
Smoothing: Use a tile nipper or a wet sander to smooth the edges of the cut tile.
Safety Tips
Always wear safety glasses to protect your eyes from flying debris.
Avoid applying excessive pressure when scoring the tile, as this can cause the blade to break.
Keep the cutter clean and well-maintained for optimal performance.
Top 5 Ceramic Tile Cutters
Selecting the right ceramic tile cutter can significantly impact the quality and efficiency of your tiling projects. Here are five of the top-rated options available on the market:
DEWALT DW7500 Wet Tile Saw: This powerful electric tile saw offers precision cutting for a variety of tile materials. It features a laser guide for accurate cuts, a variable speed motor, and a water cooling system to prevent overheating.
Husky 7 in. Wet Tile Saw: A budget-friendly option, the Husky 7 in. Wet Tile Saw provides reliable performance for both DIY and professional use. It has a sturdy base, a laser guide, and a water pump to keep the blade cool.
Makita 7-1/4 in. Wet Tile Saw: Known for their durability and power, Makita’s 7-1/4 in. Wet Tile Saw is a popular choice among professionals. It features a powerful motor, a tilting table for angled cuts, and a water cooling system.
Bosch GL-8000 Professional Tile Cutter: This manual tile cutter is ideal for smaller tiling projects. It offers precise scoring and clean breaks, making it a great option for DIYers.
QEP Tile Cutter: QEP offers a range of manual and electric tile cutters to suit different needs. Their products are known for their quality and durability, making them a popular choice among both professionals and DIYers.
Ceramic Tile Cutting Techniques
Cutting ceramic tiles precisely is a crucial skill for any DIY project. Here are some effective techniques to ensure clean and accurate cuts:
Scoring and Snapping:
Scoring: Use the scoring wheel of your ceramic tile cutter to create a deep groove along the desired cutting line. Apply firm, even pressure to ensure a clean cut.
Snapping: After scoring, gently apply pressure to the opposite side of the scored line. The tile should snap cleanly along the groove.
Wet Saw Cutting:
Mark the tile: Use a marker to mark the cutting line on the tile.
Position the tile: Place the tile on the wet saw’s bed, ensuring it’s securely held in place.
Adjust the blade: Adjust the blade height to slightly below the thickness of the tile.
Start the saw: Turn on the saw and slowly move the tile towards the blade. Apply gentle pressure.
Cool the blade: Use water to cool the blade and prevent overheating.
Using a Tile Nipper:
Score the tile: Use a scoring wheel to create a deep groove.
Snap the tile: Gently apply pressure to the opposite side of the scored line to snap the tile.
Use the nipper: If the tile doesn’t snap cleanly, use a tile nipper to break off the excess piece.
Tips for Cutting Curves:
Use a template: Create a template from cardboard or plastic to guide your cuts.
Make multiple scores: Score the tile in small sections to create a curved line.
Snap or nipper: Carefully snap or use a tile nipper to break along the scored lines.
Conclusion
A ceramic tile cutter is an indispensable tool for anyone working with tiles. By understanding the different types, key features, and proper usage, you can ensure that your tile projects are completed with precision and efficiency. With a little practice, you’ll be able to create beautiful, custom-sized tile installations.