
A voltage meter, also known as a voltmeter, is a device used to measure the potential difference, or voltage, between two points in an electrical circuit. Voltage is essential in understanding how electricity flows. It’s the force that pushes electric current through a circuit, similar to water pressure pushing water through a pipe.
A Brief History of Voltage Measurement
The story of voltage measurement is intertwined with the history of electricity itself.
Early Beginnings: With Alessandro Volta’s invention of the battery in 1800, the need to quantify electrical potential became evident. Early attempts at measuring voltage relied on simple galvanometers, devices that detected electric current.
The Galvanometer Era: Galvanometers were essential tools in the 19th century, but they were sensitive and not ideal for direct voltage measurement. Scientists and engineers adapted them by adding resistors in series to convert current to voltage readings.
The Birth of Voltmeters: Edward Weston, a pioneer in electrical measurement, introduced the first portable DC voltmeter in 1866. These voltmeters offered improved accuracy and reliability, paving the way for more precise electrical measurements.
Vacuum Tube Voltmeters: The development of vacuum tubes in the early 20th century led to the creation of vacuum tube voltmeters. These devices offered higher sensitivity and input impedance, making them suitable for measuring smaller voltages.
Digital Revolution: The advent of digital electronics brought about a significant transformation in voltage measurement. Digital voltmeters (DMMs) replaced analog meters, offering greater accuracy, speed, and ease of use.
Modern Voltmeters: Today, voltmeters have become indispensable tools in various fields, from electronics to power engineering. Advancements in technology have led to the development of handheld multimeters, which can measure voltage, current, resistance, and other electrical parameters.
Importance of voltage measurement in various fields
Voltage measurement is a cornerstone in countless industries and applications. Here are some key areas where it plays a crucial role:
Electronics
Circuit Design and Troubleshooting: Voltage measurements are essential for designing, testing, and repairing electronic circuits.
Power Supply Design: Engineers use voltage measurements to ensure power supplies deliver the correct voltage levels.
Signal Analysis: Voltage measurements are vital for analyzing and understanding electronic signals.
Electrical Engineering
Power Generation and Distribution: Voltage measurements are crucial for monitoring and controlling power generation and distribution systems.
Motor Control: Voltage measurements help regulate motor speed and performance.
Electrical Safety: Proper voltage measurements are essential for ensuring electrical safety in homes and industries.
Automotive Industry
Battery Health: Voltage measurements assess battery health and state of charge.
Engine Control: Voltage measurements are used in engine control systems to optimize performance and fuel efficiency.
Electrical Systems: Voltage measurements help diagnose and troubleshoot electrical issues in vehicles.
Industrial Applications
Process Control: Voltage measurements are used in various industrial processes to monitor and control equipment.
Quality Control: Voltage measurements help ensure product quality and consistency.
Machine Maintenance: Voltage measurements aid in diagnosing and preventing equipment failures.
Research and Development
Scientific Experiments: Voltage measurements are used in various scientific experiments to collect data and analyze results.
Medical Equipment: Voltage measurements are crucial for the operation of medical equipment like ECG machines and defibrillators
Types of Voltage Meters
There are two main types of voltmeters:
Analog voltmeters: These use a needle to indicate the voltage level on a scale.
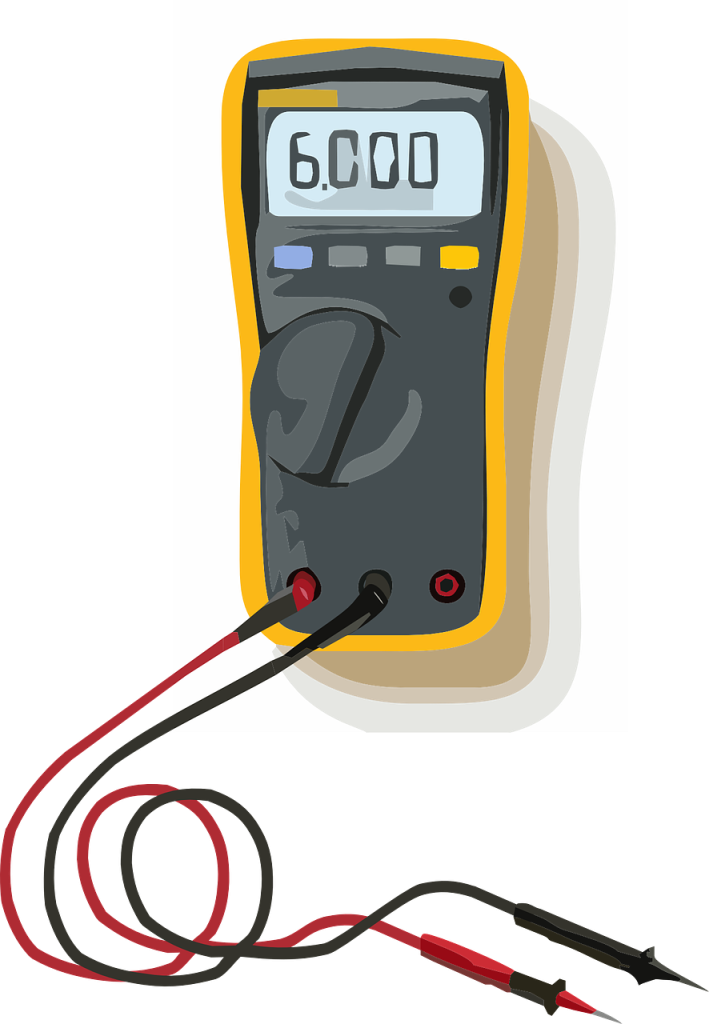
Digital voltmeters: These display the voltage as numbers on a digital screen.
Many modern voltmeters are actually multimeters, which can measure voltage, current, and resistance.
Chart comparing analog and digital voltmeters:
| Feature | Analog Voltmeter | Digital Voltmeter |
| Display | Moving needle on a scale | Numerical display |
| Accuracy | Less accurate, can be affected by vibration and parallax error | More accurate, less prone to errors |
| Reading Speed | Slower, requires interpretation of needle position | Faster, displays reading instantly |
| Cost | Generally less expensive | Generally more expensive |
| Range | Limited range | Wider range of measurable voltages |
| Additional Features | May have limited additional features | May offer additional features like data logging and min/max readings |
Multimeters: A Versatile Tool
A multimeter is a versatile electronic measuring instrument that combines multiple measurement functions into a single device.
It’s essentially a combination of an ammeter (measures current), voltmeter (measures voltage), and ohmmeter (measures resistance).
Key features and capabilities of a multimeter:
Voltage measurement: Both AC and DC voltage can be measured, allowing for a wide range of applications.
Current measurement: Can measure both AC and DC current, enabling troubleshooting in various electrical circuits.
Resistance measurement: Used to check the continuity of components and measure the resistance of resistors.
Diode testing: Can check the functionality of diodes.
Capacitance measurement: Some multimeters can measure capacitance, though this feature is often found in higher-end models.
Frequency measurement: Some advanced multimeters can measure frequency.
Multimeters are indispensable tools for electricians, electronics technicians, hobbyists, and DIY enthusiasts. They are used for troubleshooting electrical problems, repairing electronic devices, and performing various electrical measurements.
Clamp Meters: Measuring Current and Voltage
Clamp meters are invaluable tools for electricians and technicians due to their ability to measure current without interrupting the circuit.
They work by utilizing a clamping mechanism that surrounds a conductor, detecting the magnetic field generated by the current flowing through it.
Key Features and Benefits:
Non-invasive current measurement: The clamp-on design allows for easy and safe current measurement without breaking the circuit.
Versatile measurement: Most clamp meters also include functions for measuring voltage, resistance, and continuity, making them multifunctional tools.
True RMS measurement: This feature ensures accurate measurement of non-sinusoidal waveforms, often found in electronic devices.
Frequency measurement: Some clamp meters can measure the frequency of AC signals.
Data logging: Advanced models can record measurements over time for analysis.
Oscilloscopes: Visualizing Voltage Waveforms
An oscilloscope is an electronic instrument that displays a graphical representation of an electrical signal over time. It’s an essential tool for engineers, technicians, and scientists to analyze and measure various electrical quantities.
How Oscilloscopes Work:
Voltage measurement: The oscilloscope measures the voltage of an input signal and converts it into a vertical deflection of an electron beam.
Time base: The horizontal axis of the display represents time, allowing you to see how the voltage changes over time.
Waveform display: The combination of voltage and time creates a visual representation of the signal, called a waveform.
Key Features and Applications:
Waveform analysis: Oscilloscopes can display various waveforms, including sine waves, square waves, triangular waves, and complex signals.
Voltage measurement: Precise measurement of peak-to-peak, amplitude, and RMS voltage.
Frequency measurement: Determining the frequency of periodic signals.
Phase measurement: Comparing the phase relationship between two signals.
Pulse width measurement: Measuring the duration of digital pulses.
Rise time and fall time measurement: Analyzing the speed of signal transitions.
Circuit troubleshooting: Identifying signal abnormalities and diagnosing circuit problems.
How Voltage Meters Work
A voltage meter, or voltmeter, measures the potential difference between two points in an electrical circuit.
Here’s a basic breakdown of its operation:
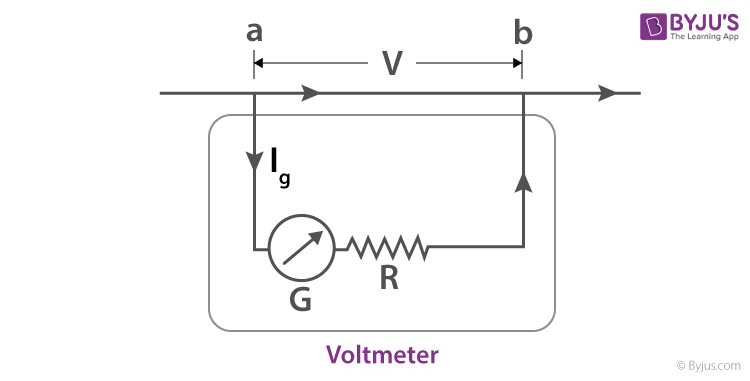
The Galvanometer Principle
Most voltmeters, whether analog or digital, are based on the galvanometer principle.
Galvanometer: This is a sensitive current-measuring device that deflects a needle in proportion to the electric current flowing through it.
Series Resistor: To measure voltage, a high-value resistor is connected in series with the galvanometer. This is crucial because voltmeters should draw minimal current from the circuit to avoid affecting the measurements.
Voltage Measurement: When connected in parallel across a circuit component, the voltmeter’s high resistance allows only a tiny current to flow through it. This current is proportional to the voltage across the component, causing the galvanometer needle to deflect accordingly.
Analog vs. Digital Voltmeters
Analog Voltmeters: These use a moving coil galvanometer and a scale to indicate the voltage. The deflection of the needle is proportional to the voltage being measured.
Digital Voltmeters: These convert the analog voltage signal into a digital value using an analog-to-digital converter (ADC). The digital value is then displayed on a digital readout.
Key Points:
High Impedance: Voltmeters must have a high internal resistance to minimize current draw from the circuit.
Parallel Connection: Always connect a voltmeter in parallel with the component or circuit you want to measure.
Accuracy: The accuracy of a voltmeter depends on factors like the quality of its components, calibration, and the range selected.
Top 5 Voltage Meters (Multimeters)
Disclaimer: The “best” multimeter depends on your specific needs and budget. Consider factors like accuracy, features, durability, and price when making your choice.
Fluke 115 Digital Multimeter
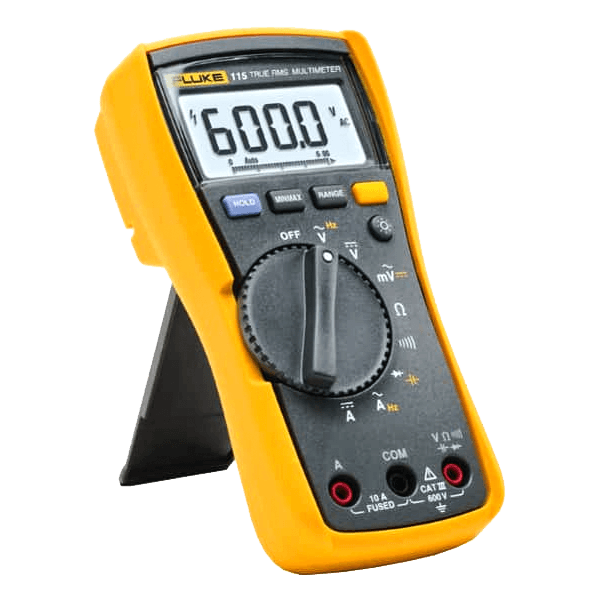
Known for: Reliability, accuracy, and durability.
Key features: True RMS, auto-ranging, large display, and multiple measurement functions.
Ideal for: Professionals and serious DIYers.
Klein Tools MM325 Digital Multimeter
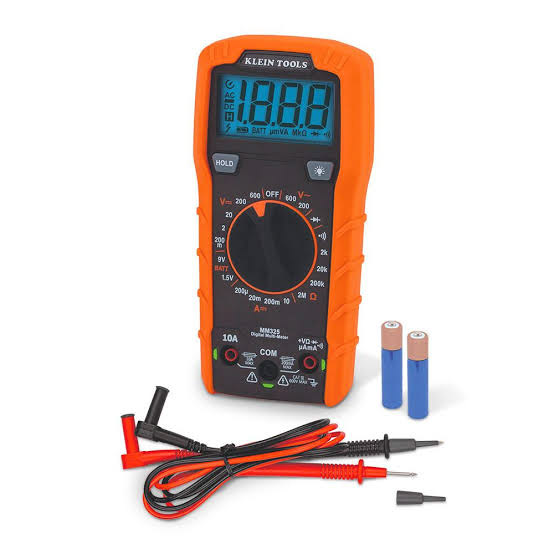
Klein Tools MM325 Digital Multimeter
Known for: Ruggedness and durability.
Key features: Manual ranging, multiple measurement functions, and a compact design.
Ideal for: Electricians and construction workers.
AstroAI Digital Multimeter
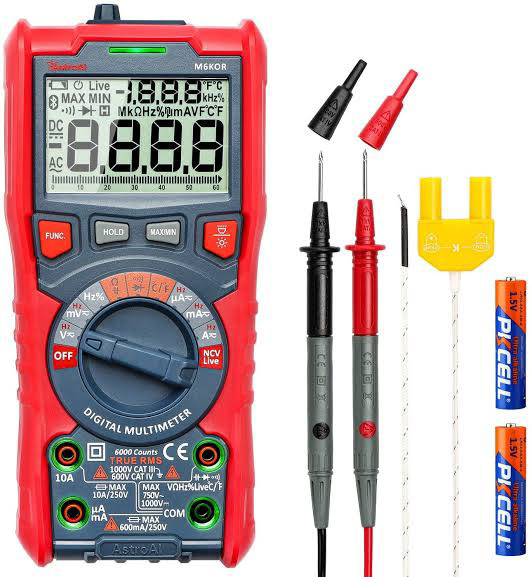
Known for: Affordability and basic functionality.
Key features: Auto-ranging, multiple measurement functions, and a backlit display.
Ideal for: Beginners and hobbyists.
UNI-T UT133B Digital Multimeter

Known for: Good value for money and basic features.
Key features: Auto-ranging, multiple measurement functions, and compact size.
Ideal for: Students and DIYers on a budget.
Brymen BM235 Digital Multimeter
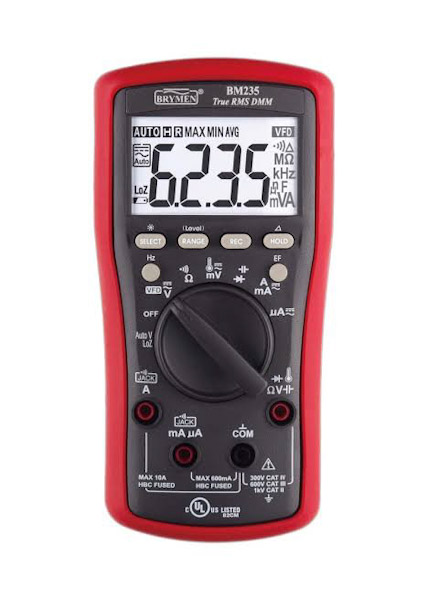
Known for: Accuracy and reliability.
Key features: True RMS, auto-ranging, multiple measurement functions, and a large display.
Ideal for: Professionals and demanding applications.
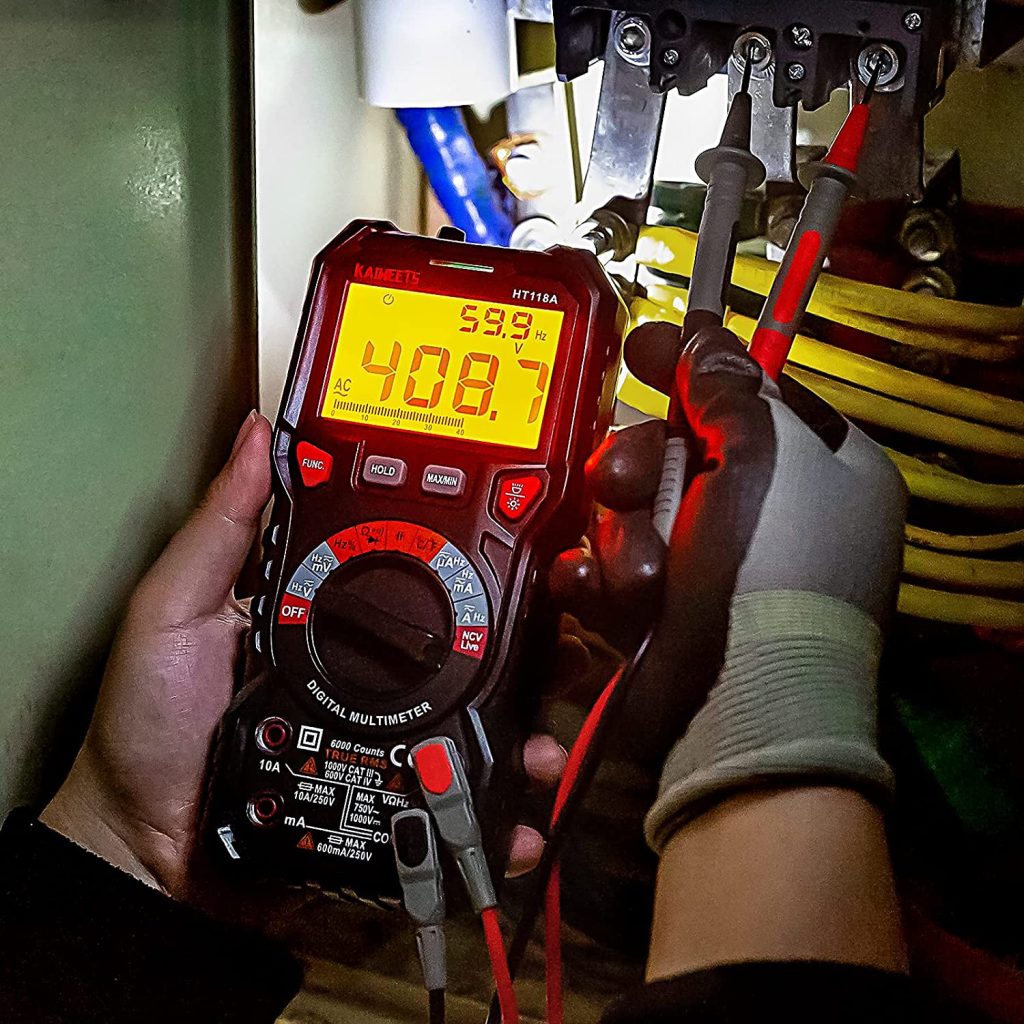
Using a Voltage Meter Safely
Using a voltage meter, or multimeter, can be dangerous if it does not done correctly. Here are some essential safety precautions:
General Safety Precautions
- Always assume a circuit is live until you verify it’s not.
- Wear appropriate personal protective equipment (PPE), including safety glasses, insulated gloves, and non-conductive footwear.
- Work in a dry environment. Water can conduct electricity.
- Never work alone. Have someone nearby to assist in case of an emergency.
- Understand the limitations of your meter. Don’t exceed its rated voltage or current.
Specific Safety Tips
- Inspect the meter and probes before use. Look for damage to the insulation or casing.
- Use the correct range. Start with a higher range and gradually reduce it as needed.
- Avoid touching metal parts of the probes. This can complete the circuit through your body.
- Be aware of your surroundings. Keep clear of hazards like water or metal objects.
- Turn off power to the circuit if possible. This is the safest way to work.
- Use one hand to hold the probes. This reduces the risk of a hand-to-hand shock.
- Calibrate your meter regularly. Ensure accurate readings.
Emergency Procedures
- Know your emergency procedures. Have a plan in place for electrical shocks.
- Turn off the power immediately. If possible, cut off the power source.
- Seek medical attention if necessary. Even minor shocks can have serious consequences.
Remember: Safety should always be your top priority when working with electricity. By following these guidelines, you can significantly reduce the risk of accidents.
Proper Grounding Techniques for Voltage Meters
Grounding is crucial for ensuring the safety of both you and your equipment when using a voltage meter. While the meter itself doesn’t typically require a dedicated ground connection, proper grounding of the circuit you’re testing is essential.
Grounding the Circuit
Identify the Ground: Determine the ground reference point in the circuit. This is usually a metal chassis, a ground wire, or a neutral connection.
Connect the Ground Probe: Connect the black (common) probe of your multimeter to the identified ground point.
Ensure Good Contact: Make sure the probe is securely connected to the ground point to avoid inaccurate readings or electrical shocks.
Additional Considerations
Three-Prong Outlets: In most household circuits, the third prong is the ground. However, always verify this using a multimeter.
Automotive Applications: When working on cars, the negative battery terminal is often used as a ground reference.
Industrial Settings: Grounding procedures may vary depending on the specific equipment and environment. Always follow safety protocols and local regulations.
Importance of Grounding
Safety: Proper grounding helps to prevent electrical shocks by providing a low-resistance path for fault currents.
Accuracy: A grounded circuit provides a stable reference point for voltage measurements, ensuring accurate readings.
Equipment Protection: Grounding helps protect your equipment from damage caused by electrical surges or faults.
Remember: Always prioritize safety when working with electricity. If you’re unsure about grounding procedures, consult with a qualified electrician or refer to the equipment’s manual.
Common Mistakes When Using a Voltage Meter
Using a voltage meter incorrectly can lead to inaccurate readings, damage to the meter, or even personal injury.
Here are some common mistakes:
- Incorrect Range Selection
- Overloading the meter: Using a range too low for the measured voltage can damage the meter.
- Inaccurate readings: Using a range too high can result in less precise measurements.
- Improper Probe Placement
- Incorrect polarity: Connecting the probes incorrectly can damage the meter or give incorrect readings.
- Touching metal parts: Accidental contact with the metal parts of the probes can result in a shock.
Ignoring Safety Precautions
Not wearing protective gear: Failing to use safety glasses, gloves, and insulated shoes can lead to injury.
Working in unsafe environments: Ignoring wet conditions or working in confined spaces increases the risk of accidents.
Misinterpreting Readings
Reading the scale incorrectly: Misreading the analog meter scale or the digital display can lead to errors.
Ignoring units: Not paying attention to the units of measurement can result in incorrect calculations.
Neglecting Meter Maintenance
Ignoring calibration: A poorly calibrated meter will provide inaccurate readings.
Not protecting the meter: Exposing the meter to harsh environments or dropping it can damage it.
Using the Meter for Incorrect Purposes
Measuring current with the voltage setting: This can damage the meter and give incorrect readings.
Ignoring meter limitations: Using the meter beyond its specified range can lead to inaccurate results or damage.
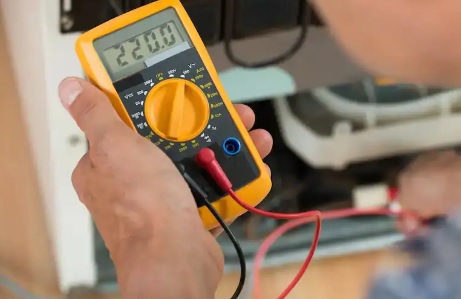
Troubleshooting Electrical Circuits
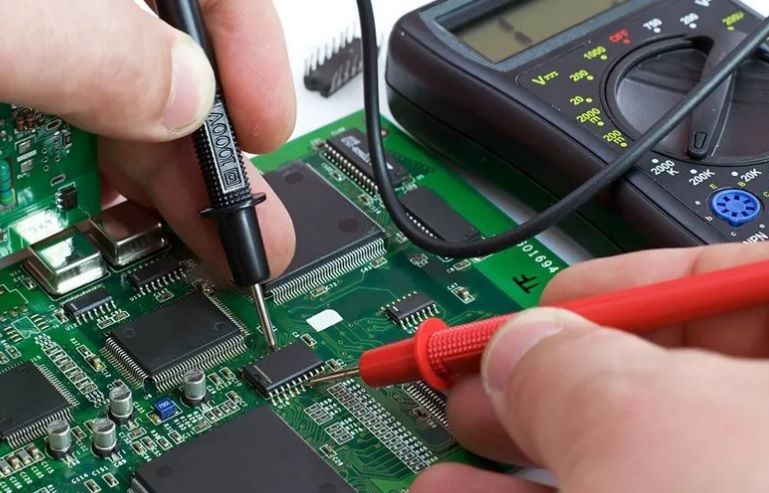
A voltage meter is an invaluable tool for troubleshooting electrical circuits. Here’s a basic approach:
Understanding the Circuit
Diagram: If available, study the circuit diagram to understand component connections.
Functionality: Determine the circuit’s intended function.
Symptoms: Clearly define the problem. Is there no power, partial power, or incorrect operation?
Safety First
Power Off: If possible, disconnect the circuit from the power source.
Protective Gear: Wear appropriate safety gear, including gloves and safety glasses.
Systematic Approach
Visual Inspection: Check for obvious issues like loose connections, damaged wires, or burnt components.
Voltage Measurements:
Power Supply: Verify the voltage at the power source.
Components: Measure voltage across each component to identify voltage drops.
Ground: Check for a good ground connection.
Continuity Tests: Use the ohmmeter function to check for open circuits in components.
Component Testing: If possible, isolate and test components individually.
Process of Elimination: By systematically checking components, you can narrow down the problem area.
Common Issues and Troubleshooting
No Power:
Check fuses, circuit breakers, and power source.
Inspect for open circuits in the main power line.
Partial Power:
Check for voltage drops across components.
Look for faulty switches or connectors.
Incorrect Operation:
Verify component values and functionality.
Check for signal issues if applicable.
Additional Tips
Record Measurements: Keep a record of your measurements for reference.
Use a Schematic: A clear circuit diagram can greatly aid troubleshooting.
Component Substitution: If possible, temporarily replace suspected faulty components with known good ones.
Seek Expert Help: If you’re unsure or unable to resolve the issue, consult a qualified electrician.
Testing Batteries with a Voltage Meter
A voltage meter is a basic but effective tool for testing batteries. Here’s a simple guide:
Equipment Needed:
Digital multimeter
Steps:
Set the multimeter to DC voltage mode: Ensure the range is higher than the battery’s rated voltage.
Identify battery terminals: Locate the positive (+) and negative (-) terminals on the battery.
Connect the multimeter: Connect the red probe to the positive terminal and the black probe to the negative terminal.
Read the voltage: The multimeter will display the battery’s voltage.
Interpreting the Results:
Full charge: The voltage should be close to the battery’s rated voltage (e.g., 1.5V for AA, 9V for a 9V battery).
Partially charged: The voltage will be lower than the rated voltage.
Dead battery: The voltage will be very low or zero.
Note: While measuring voltage is a good indicator of battery health, it doesn’t provide information about the battery’s capacity or internal resistance.
Additional Tips:
For car batteries, a voltage reading can be a starting point, but a load test is recommended for a more accurate assessment.
Some digital multimeters have a dedicated battery test function for convenience.
Always follow safety precautions when working with electricity.
Example: Testing a 9V Battery
If you measure a 9V battery and the multimeter reads 8.5V, the battery is partially charged. A reading of 7V or lower indicates a weak or dead battery.
Automotive Diagnostics with a Voltage Meter

While a voltage meter is a fundamental tool for automotive diagnostics, it’s often used in conjunction with other diagnostic tools for comprehensive analysis. Here are some common applications:
Battery Testing
Voltage check: As discussed earlier, a voltage reading can indicate battery health.
Load testing: This requires a load tester to assess the battery’s ability to deliver current under load.
Charging System Diagnosis
Alternator output: Check voltage while the engine is running to assess alternator health.
Battery charging: Verify if the battery is charging correctly by measuring voltage with the engine running.
Starting System Diagnosis
Voltage drop: Check for excessive voltage drops in the starter circuit.
Battery condition: Ensure the battery has sufficient voltage to start the engine.
Electrical System Troubleshooting
Circuit voltage: Check for correct voltage levels in various circuits.
Ground connections: Verify good ground connections for components.
Open or short circuits: Identify issues by measuring voltage drops.
Limitations of a Voltage Meter
Complex systems: Modern vehicles have intricate electrical systems that require specialized diagnostic tools.
Sensor readings: Many components rely on sensor input, which cannot be directly measured with a voltage meter.
Diagnostic codes: Advanced systems store trouble codes that require specific tools to retrieve and interpret.
Advanced Diagnostic Tools
OBD-II scanners: These tools can read and clear trouble codes, access live data, and perform various tests.
Oscilloscope: Used to analyze waveforms and identify electrical issues.
Multimeter with clamp-on ammeter: For measuring current without interrupting the circuit.
Remember: Automotive diagnostics often requires specialized knowledge and equipment. If you’re not comfortable performing these tests, it’s best to consult a qualified mechanic.
Factors to Consider When Buying a Voltage Meter
Choosing the right voltage meter, often referred to as a multimeter, depends on your specific needs. Here are key factors to consider:
Intended Use:
Home DIY: A basic multimeter with auto-ranging, voltage, current, and resistance measurement is sufficient.
Professional electrician: A rugged, durable model with advanced features like clamp-on current measurement, data logging, and temperature measurement might be necessary.
Electronics hobbyist: A multimeter with higher accuracy and the ability to measure capacitance or frequency might be beneficial.
Measurement Range:
Voltage range: Ensure the meter can measure the highest voltage you expect to encounter.
Current range: Consider the maximum current you’ll measure.
Resistance range: For component testing, a wide resistance range is useful.
Accuracy:
Precision: Higher accuracy is crucial for sensitive measurements or calibration purposes.
Tolerance: Understand the meter’s accuracy limits.
Features:
Auto-ranging: Automatically adjusts the measurement range.
Data holding: Freezes the displayed value for easy reading.
Backlit display: Improves visibility in low-light conditions.
True RMS: Accurate measurement of non-sinusoidal waveforms.
Capacitance measurement: For testing capacitors.
Frequency measurement: For analyzing AC signals.
Temperature measurement: For measuring temperature.
Diode testing: For checking diode functionality.
Safety:
Overload protection: Protects the meter from damage.
Category rating: Indicates the meter’s suitability for different voltage levels.
Probe quality: Ensure the probes are well-insulated and have secure connections.
Durability:
Build quality: Consider the meter’s construction for withstanding drops and impacts.
Case material: A rugged case protects the meter.
Brand Reputation:
Reliability: Choose a reputable brand known for quality and customer support.
Budget:
Cost: Balance desired features with your budget.
By carefully considering these factors, you can select a voltage meter that perfectly suits your needs and ensures safe and accurate measurements.
Voltage Meter Specifications: Accuracy, Range, and Resolution
Understanding the Terms
Accuracy: How close a measured value is to the true value. Often expressed as a percentage of the reading plus a number of digits.
Range: The maximum and minimum values a meter can measure.
Resolution: The smallest change in value the meter can detect and display.
Typical Voltage Meter Specifications Table
| Parameter | Typical Value | Explanation |
| DC Voltage Range | 200mV – 1000V | Maximum and minimum measurable DC voltage |
| DC Voltage Accuracy | ±(0.5% + 2 digits) | Percentage of reading plus a number of digits |
| DC Voltage Resolution | 0.1mV – 10V | Smallest measurable voltage change |
| AC Voltage Range | 200mV – 750V | Maximum and minimum measurable AC voltage |
| AC Voltage Accuracy | ±(1.0% + 3 digits) | Percentage of reading plus a number of digits |
| AC Voltage Resolution | 1mV – 10V | Smallest measurable voltage change |
Note: These are typical values and can vary significantly between different multimeter models. Higher-end models will often have better accuracy and resolution.
Example: Interpreting Specifications
If a multimeter has a DC voltage range of 200mV to 1000V with an accuracy of ±(0.5% + 2 digits), it means:
You can measure DC voltages from 200 millivolts to 1000 volts.
The accuracy is calculated as 0.5% of the reading plus 2 digits. For example, if you measure 200V, the accuracy would be ±(0.5% * 200V + 2) = ±1 + 2 = ±3V. The true value would be between 197V and 203V.
Remember:
Higher accuracy typically comes with a higher price.
For most general-purpose applications, a multimeter with moderate accuracy is sufficient.
Always refer to the specific specifications of your multimeter for precise information.
Budget-Friendly Options vs. Professional-Grade Meters
Budget-Friendly Options
Target audience: Hobbyists, DIYers, occasional users.
Key features: Basic voltage, current, and resistance measurements.
Accuracy: Typically within 1-2%.
Durability: May not be as rugged for heavy-duty use.
Price range: Affordable.
Examples: AstroAI, UNI-T, Extech entry-level models.
Professional-Grade Meters
Target audience: Electricians, engineers, technicians.
Key features: Advanced functions like capacitance, frequency, temperature, data logging, and True RMS.
Accuracy: Often within 0.5% or better.
Durability: Built to withstand harsh environments and heavy use.
Price range: Higher cost.
Examples: Fluke, Klein, Fluke Networks, Keysight Technologies.
Comparison Table
| Feature | Budget-Friendly | Professional-Grade |
| Price | Low | High |
| Accuracy | Moderate | High |
| Durability | Moderate | High |
| Features | Basic | Advanced |
| Target User | Hobbyists, DIYers | Professionals |
When to Choose Which
Budget-friendly: If you need a multimeter for occasional tasks like checking batteries, troubleshooting simple circuits, or basic electrical work.
Professional-grade: If you work in a field requiring precision measurements, frequent use in harsh environments, or advanced features like data logging and specialized measurements.
Remember: While budget-friendly meters are suitable for many tasks, investing in a professional-grade meter can save time and money in the long run, especially for frequent or critical measurements.
Importance of Voltage Meter Calibration
Calibration is the process of adjusting a measuring instrument to ensure it provides accurate readings.
For a voltage meter, this means comparing its measurements to a known standard and making adjustments as necessary.
Why is Calibration Important?
Accuracy: Over time, components within a voltage meter can degrade, leading to inaccurate readings. Calibration ensures that measurements are reliable.
When to Calibrate
Regular intervals: Most manufacturers recommend calibration at least once a year.
After damage: If the meter is dropped or exposed to harsh conditions, calibration is necessary.
Suspected inaccuracy: If you suspect the meter is providing incorrect readings.
Critical applications: For high-precision work, more frequent calibration may be required.
Calibration Process
Calibration is typically performed by a specialized laboratory using calibrated reference standards. However, some multimeters have self-calibration features or allow for user adjustments.
Remember: While self-calibration can be helpful, it’s often not as accurate as professional calibration.
By prioritizing calibration, you can ensure the reliability and accuracy of your voltage meter, safeguarding both your work and your safety.
Key takeaways:
Choose the right meter: Consider your needs, budget, and the specific applications.
Prioritize safety: Always follow safety guidelines to prevent accidents.
Regular calibration: Ensure accurate measurements through periodic calibration.
Continuous learning: Stay updated on the latest multimeter features and techniques.
By mastering the art of voltage measurement, you can enhance your electrical troubleshooting skills, improve efficiency, and ensure the safe operation of electrical equipment.
Conclusion
A voltage meter, or multimeter, is an indispensable tool for anyone working with electricity. From basic troubleshooting to complex electrical systems, it provides invaluable insights into circuit behavior.
By understanding the different types of voltage meters, their functions, and safety precautions, you can effectively use this instrument to measure voltage, current, resistance, and other electrical parameters.